Mac里安装动易系统WebFuture
本文摘录2023年8月份学习总结,有修改。
在Mac里安装动易网站系统 WebFuture ,由于 WebFuture 系统已支持多平台部署,奈何电脑内存不多,那就简简单单 mac+mysql+nginx mysql不装在本地,连上用服务器吧。
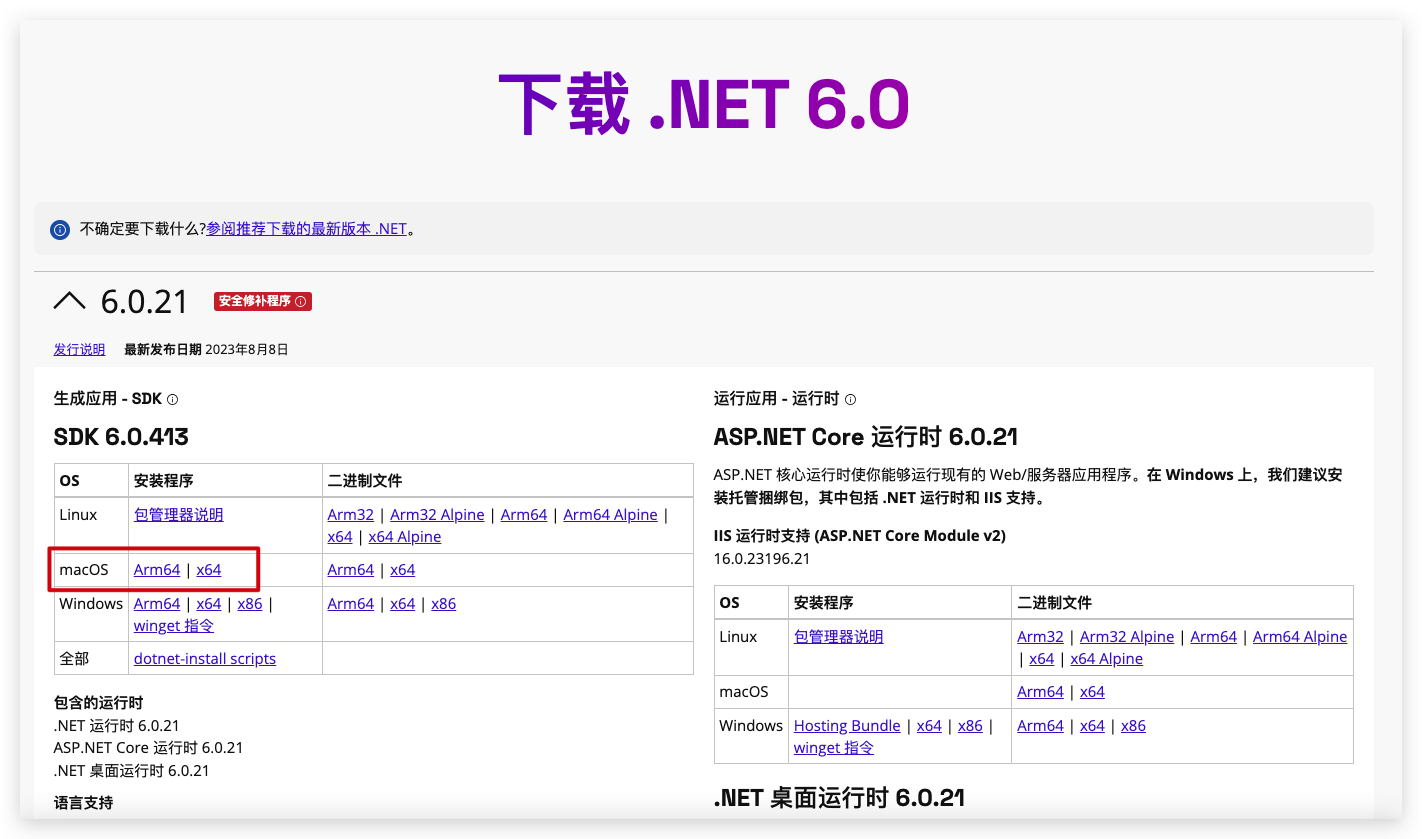
1、安装dotnet
对macOS安装 dotnet ,要看清楚自己电脑型号,是否intel(选择x64)、还是m1/m2(选择arm),下载地址:
https://dotnet.microsoft.com/zh-cn/download/dotnet/6.0
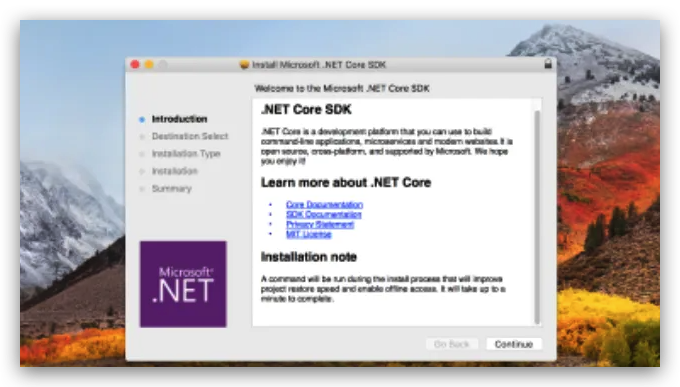
下载后就直接安装了。
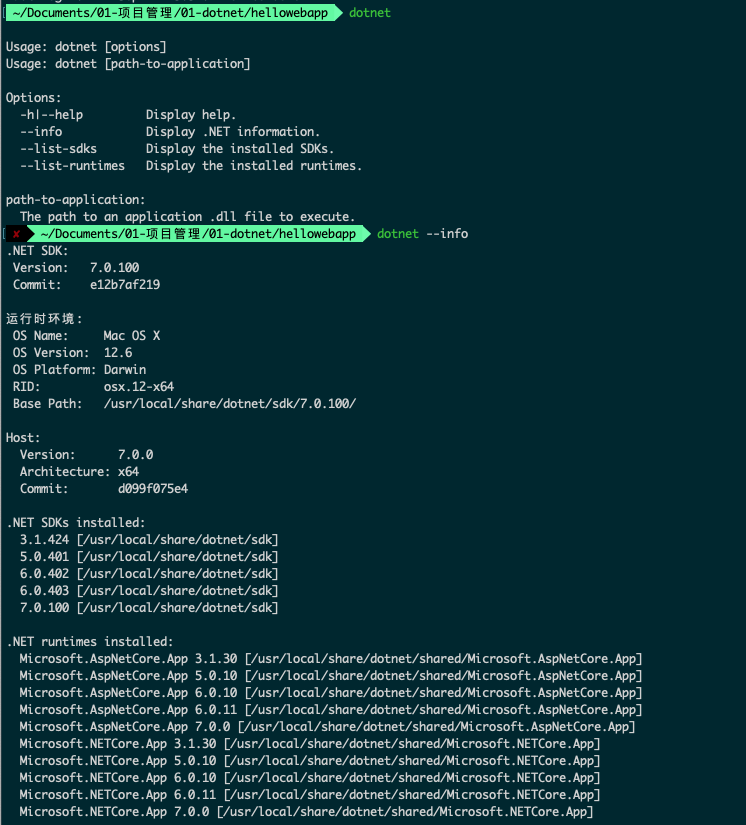
2、验证 dotnet
dotnet 下载完成后,在终端查看。验证如下图。
dotnet info |
3、测试运行情况 Hello world
mkdir hellowebapp #建立文件夹 |
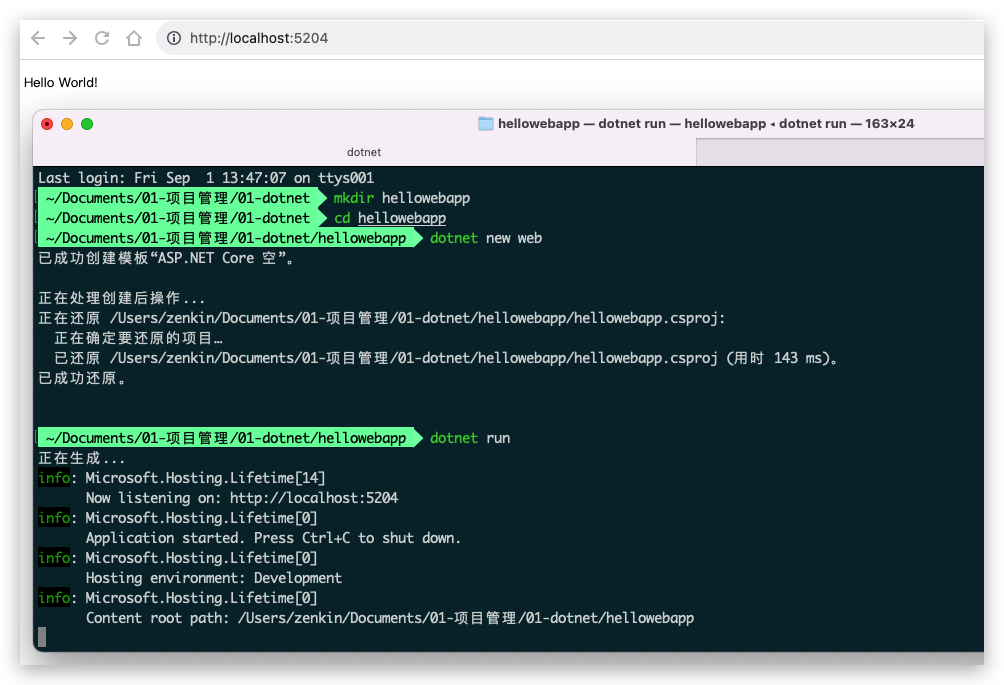
妥妥的 Hello World ,成功了。
4、安装Webfuture
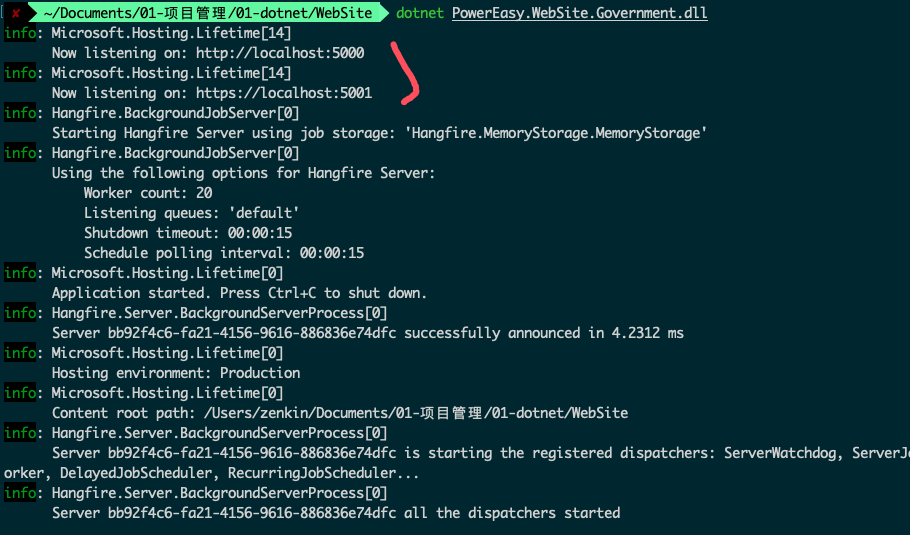
① 安装包下载。
② 终端运行 dll 文件,基本上就可以跑通了。
dotnet PowerEasy.WebSite.Government.dll |
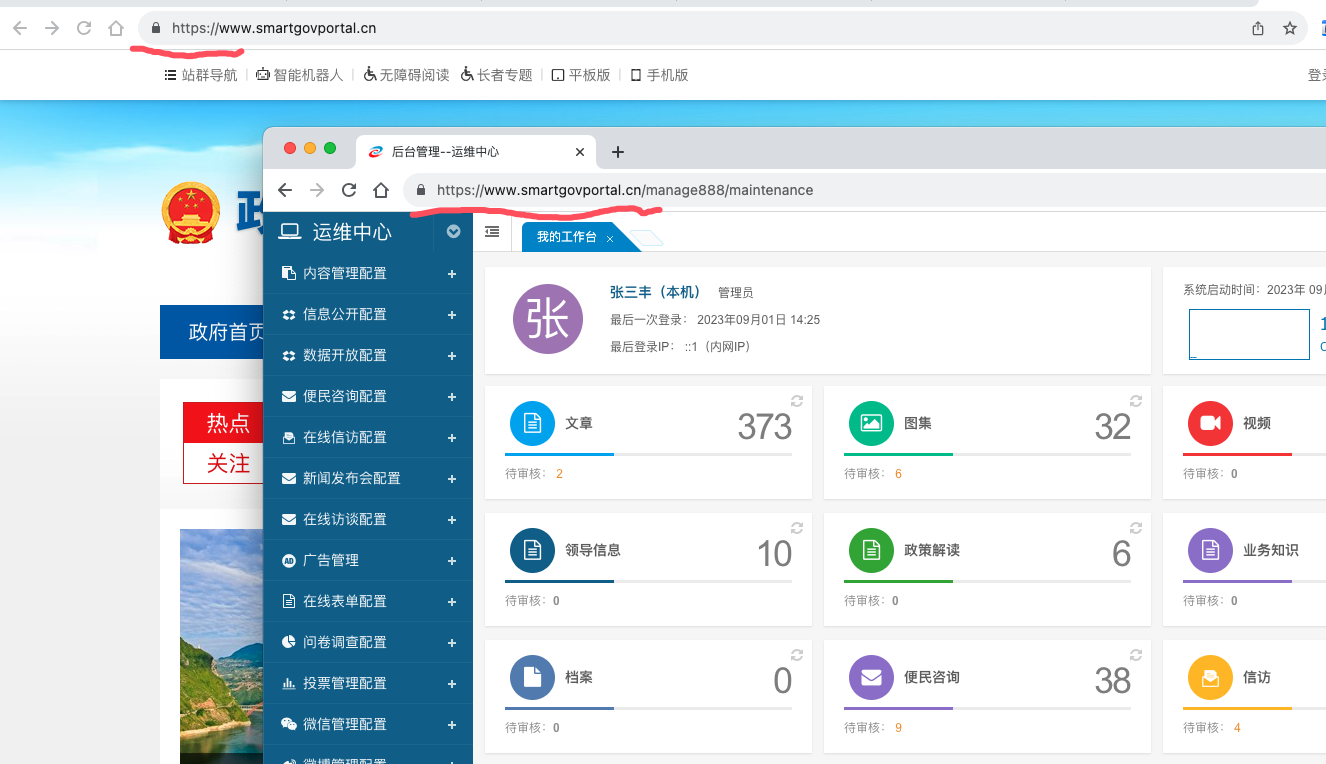
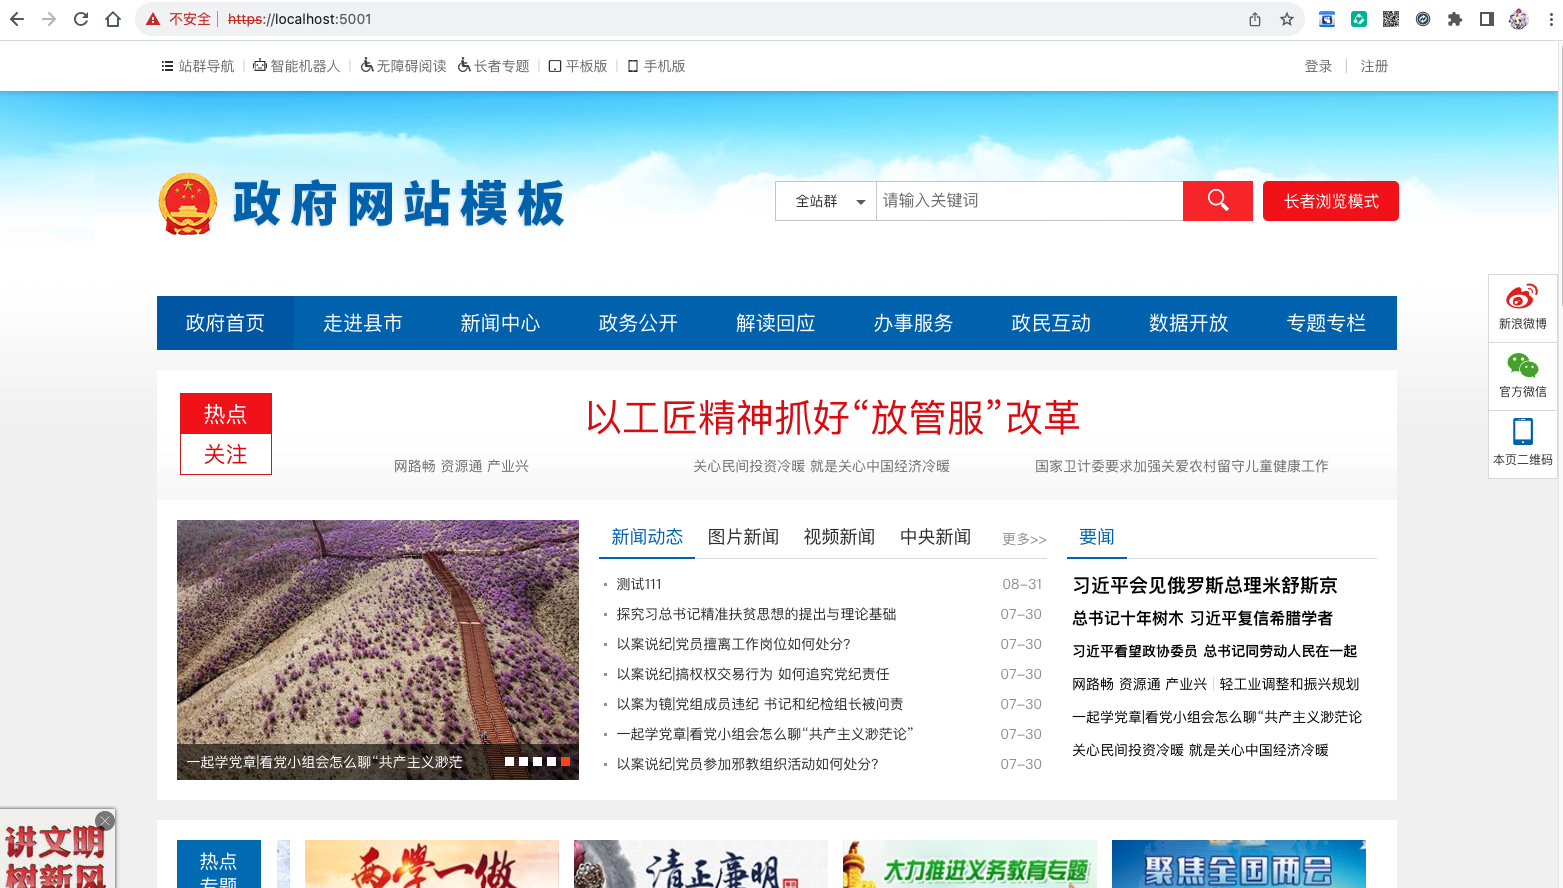
③本机内存不够,连的是别的服务器的mysql;另外还有一些比如 ulimit 参数设置、字体设置的,我这就没处理了,访问
https://localhost:5001/ 看网站(能访问就行,还要什么面包呢?):
5、nginx代理
强迫症的这个地址太丑了,还有不安全的 https 提示(本地就这样),所以用 nginx 去代理下吧,监听 443 到 5001 吧,在网站后台也是如此设置。
server { |
6、mac改hosts
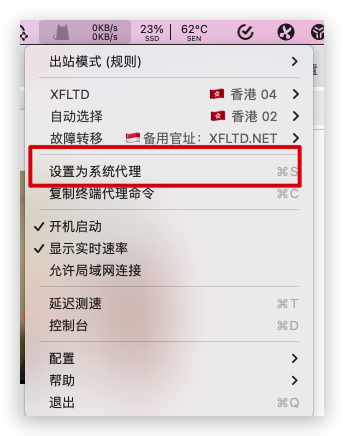
改 hosts 这个就很简单了(设置略,用 utool 更改是挺方便的),但是也扰攘了很久,为什么我的会不生效呢?用 ping 可以通,但是浏览器就不生效。思来想去,抬头一看,我开了 ClashX 这个代理(呃呃~~翻墙必备),得去掉代理。
ping www.smartgovportal.cn -c 10 |
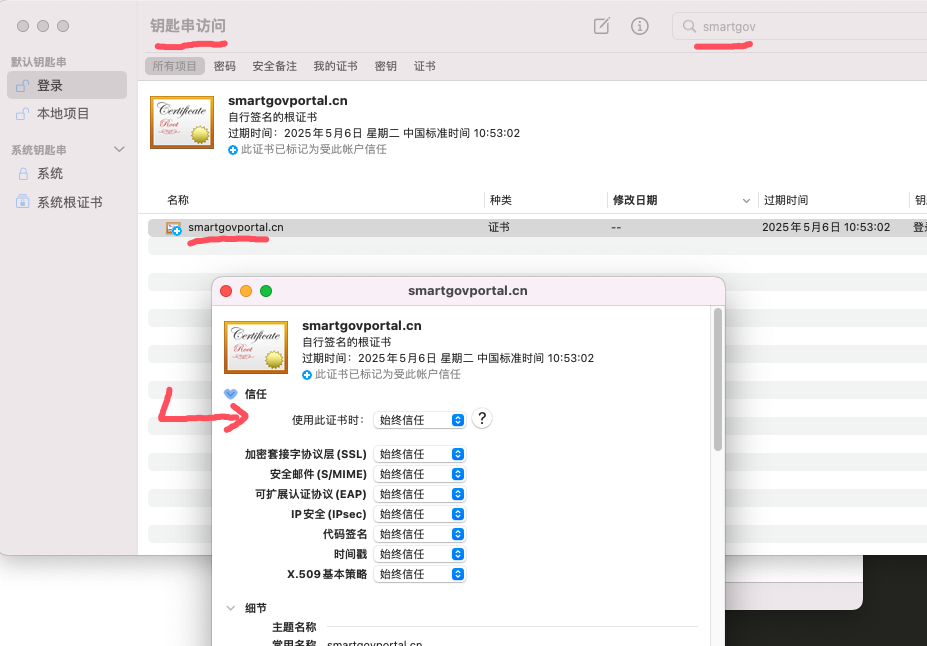
7、自签证书问题
我用的安装包里的自签证书,在mac里需要手动加入信任。双击 .crt 文件 ,进入钥匙串访问 ,找到域名证书,信任->始终信任。
8、完成
至此完成了,再注意 nginx 服务的开启即可。由于使用了域名的,尽管说本地访问,也只能使用免费版。只是,看起来顺眼了许多。